This is found on a page on this site also for easy referral.. The instructions are on the packet of Dylon, but I have a few tips ..oh I think I forgot to add.. LEAVE OVERNIGHT (packet says 4 hours) and place under a large book (prevents bubbles)


This is found on a page on this site also for easy referral.. The instructions are on the packet of Dylon, but I have a few tips ..oh I think I forgot to add.. LEAVE OVERNIGHT (packet says 4 hours) and place under a large book (prevents bubbles)

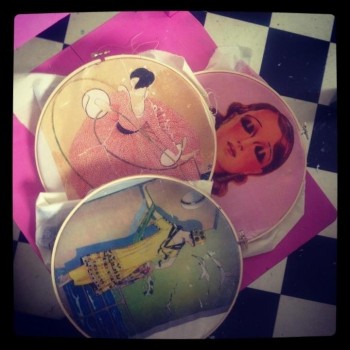
Made these for a shop..you could make your own version…
by, using bought fabric or following some of my earlier posts etc and printing your own..maybe from a class photo?

some help???
https://ewesir.wordpress.com/2012/03/02/batik-pinboard/
Permalink: https://ewesir.wordpress.com/2012/04/15/httpwww-instru…t-notice-board/
would love to see what you make. x

Visual Step by step
ingredients..
pastel pinks, peaches, mauves
copper, brown, copper-red.
all 100% merino wool


How am i going to convince my machine to let me do this??

..found this on Pinterest..and the link is http://www.flamingotoes.com/2011/07/stitched-furniture-silhouettes/

Lots of hows, and a post where you don’t actually have to read it to figure it out..LOVE LOVE LOVE
so it means back to begging “john” my sewing machine in order to do this.
I have an idea I want to do a deer applique using fun fabric on a soft background and incorporate some stitching..

So I mite try combining ideas, and do a full deer, which will let me practice those soft delicate curves ..
fingers crossed and bobbins loaded

My new piece, well actually pieces.
I couldn’t quite decide the @perspective@ on this one so i did two!!
I wanted to do a monocrome one and one with a more twilight feel to it..
They are shy a few details, need to pop a little lace on cuffs on the monocrome one and stitch on little origami flowers into the hand and background, as if she is leaving them as breadcrums..

I’ve been experimenting with types of pre-felt also, as my work as gotten more detailed, the felt I have been using has been too elastic to hold further ‘needling’, finally i have found one that works…
this is a link if you interested in the make/type/consistancy…I have experimented with lots, and they have snapped needles etc, yes, i have to be a little careful with the force I use but I think it holds the detail better and the price is great.
http://corkartsupplies.com/Felt-45cm-1.5mm-x-5m-Grey-8716052137954

Here you can see i have gotten more confident in my ‘drawing’ with the sewing machine, so used some gold thread, to show off, of course.

This is the final piece, except for a little tweaks, I like her attitude.
I always find my mood in reflected in the faces. Guess how I was feeling!

Hmm pic doesn’t do it justice, Its very smoky and fells like twilight is just settling..whern both are framed I will update this post.
….some time later…

Hope you like.
To Make This
")
YOU WILL NEED THESE..
")
1. cheap canvas frame or an old frame from discount store
2. wadding/foam
3. fabric
4.ribbon
5. buttons/badges
6.needle & tread
7. scissors (fabric ones)
8. staple gun
9. nice cup of tea
First..
take the wadding..(that white foamy stuff) and fold over to make a bit thicker
")
and cut so it is slightly smaller than whole canvas
")
Now…
Lay fabric(couple of inches larger on all sides that the canvas) face down on you work surface
lay wadding in the centre of this
line up canvas face down on top of this
")
You can see it here, waiting to be lined up.
STAPLE GUN TIME (my favourite bit)
") That’s stanley the staple gun above.
That’s stanley the staple gun above.
Tip for using staple guns…wedge something simular height under it so it is even- needs less strength and ensures the staples go fully in.
secure the fabric to the frame with a staple in the middle of each side..stretching the fabric as you go around so theres no wrinkles/ripples
keep working your way around like this except for the corners.
")
anyone as meticulous as me will know how to make “prison corners” named after how to fold the corners of the bed sheets.
pull one edge under the other. keep in place using a finger, and pull the other side over this
secure with staple gun
NOW …
")
Secure ribbon from behind using staple gun…ensure they are pulled tight across the front otherwise they won’t do their job of holding things in place…
Decorate with clips/badges etc….I also used pins to secure thing and sewed on a few buttons…you cud hang things from these buttons too!
Took me max 5minutes…and was a third of the price I saw in the shop!!
Watch out for my detailed fabric printing post comming soon..would look great to make a notice board out of a family photograph..quick guide
https://ewesir.wordpress.com/category/dylon-image-maker/
I’ve been looking at the different ways I have been rendering the faces through these projects so I thought I’d write a small post on them.
The fibres used for the faces are all merino wool tops, it needs that delicacy and shine.
I had to dye some fleshy colours…outlined in previous post
https://ewesir.wordpress.com/tag/dye/

Whatever “look” ypou are going for heres a few things to consider…

1, Do the darker colours first, the cheeks, shadows and hair near the face first.
This will stop the darker fibres overlaying on the face, as you can see what happened here….
the legs are a good example of the different colours I used for skin tone.
")
2. Layering is the key, felt fine layers of lighter shades to build up face
It took alot of layering due to the way I started.
")
")
3. Tight needle felting. make sure you use the needle alot.
here i left part of the hair unfelted as a contrast to the face and as a more natural representation of hair!
Hope its helpful…maybe I might consider taking my own advice now!!
